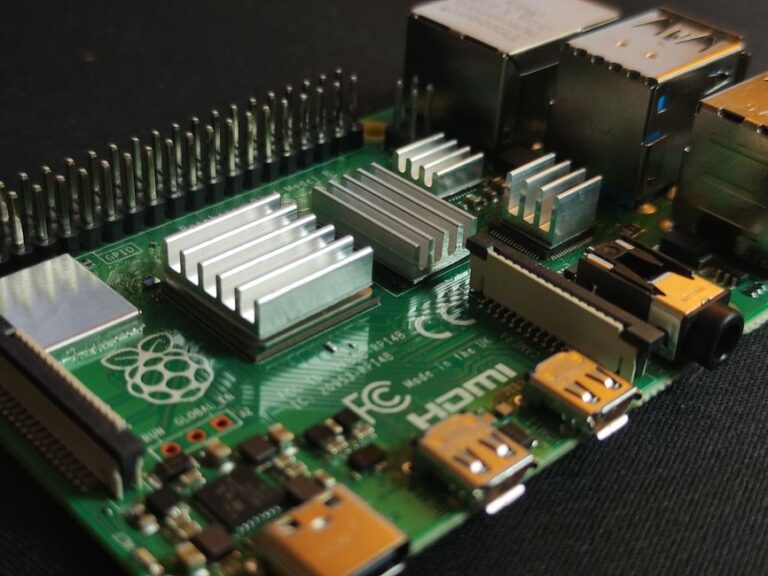
Running a Bitcoin full node on a Raspberry Pi 4 strengthens network decentralization, gives you independent transaction verification, and enhances your privacy, all with low power consumption and modest cost. This authoritative guide explains the complete hardware checklist, clean operating system setup, secure Bitcoin Core installation, pruning versus archival trade-offs, and practical maintenance so you can operate a reliable node for the long term.
Hardware Checklist for a Raspberry Pi 4 Bitcoin Full Node
A stable Bitcoin node begins with appropriate hardware that balances performance, reliability, and thermal headroom. The Raspberry Pi 4 Model B is mature, well supported, and energy efficient for continuous operation.
- Raspberry Pi 4 Model B: Prefer 4 GB or 8 GB RAM for smoother initial block download and steady multitasking.
- Quality USB 3.0 SSD: Use a high‑endurance SATA SSD in a USB 3.0 enclosure. For a pruned node, dozens of gigabytes are enough with headroom. For an archival node, plan for hundreds of gigabytes and growing, plus additional free space for the database and OS.
- Reliable Power Supply: Official 5V/3A USB‑C power supply or equivalent, with a short, thick cable to prevent voltage drops.
- Case, Heatsinks, and Fan: Active cooling significantly reduces throttling during the initial block download, which is CPU and I/O intensive.
- MicroSD Card or SSD Boot: A 16–32 GB microSD card is fine for the OS if you store the blockchain on SSD. Alternatively, boot the OS directly from SSD for improved reliability.
- Wired Ethernet: A stable, low‑latency network improves sync time and peer connectivity. Wi‑Fi works but is less reliable.
- Optional UPS: A small uninterruptible power supply helps avoid abrupt shutdowns and filesystem corruption.
Why SSD Quality Matters for Bitcoin Core
Bitcoin Core performs many random reads and writes during validation and database compaction. A high‑endurance SSD with a DRAM cache and good sustained performance reduces sync time, minimizes wear, and improves long‑term reliability.
Operating System Setup on Raspberry Pi 4 for Bitcoin Core
Use a lean, 64‑bit server OS with long‑term support to minimize resource usage and simplify maintenance. Raspberry Pi OS Lite (64‑bit) and Ubuntu Server for ARM64 are both commonly used and well documented.
Clean Install and First Boot
- Flash a fresh 64‑bit server image to microSD or SSD using a reputable imaging tool, then enable SSH if you plan to manage headless.
- On first boot, change default credentials, set your locale and time zone, and update the system packages to the latest stable versions.
- Create a dedicated user for services if you want separation between administration and the node process.
System Hardening Essentials
- SSH Keys and Firewall: Disable password SSH logins, permit key‑based access, and enable a host firewall. Allow inbound TCP 22 for SSH and 8333 for Bitcoin if you intend to accept inbound peers.
- Automatic Security Updates: Enable unattended upgrades or periodic security patches. Schedule maintenance reboots only when necessary.
- Time Synchronization: Ensure system time is correct via NTP to prevent consensus issues from clock skew.
Storage and Filesystem Considerations
- Mount Options: Use reliable filesystems and enable write‑barrier and journaling defaults to protect against power loss.
- Swap: Configure modest swap space on SSD with a sensible swappiness, balancing memory headroom and flash wear.
- Backups: If you will hold funds on this node, plan secure, offline backups of wallet descriptors or wallet.dat and any seed material.
Installing and Verifying Bitcoin Core on Raspberry Pi 4
Always obtain the latest stable Bitcoin Core release from trusted sources and verify signatures before installation. Signature verification helps confirm authenticity and integrity of the binaries you install.
Best Practices for Installation
- Download the latest stable release for ARM64 and its associated signatures.
- Verify the authentic signatures against the maintainers’ published keys through a trusted channel before installing.
- Install the binaries and confirm the expected version by invoking the client and daemon with the version option.
Running Bitcoin Core as a System Service
- Create a dedicated data directory on the SSD. Place the Bitcoin Core configuration file there for clear separation from the OS.
- Run the daemon under a non‑privileged user, and configure a system service so the node starts automatically at boot and restarts on failure.
- Log to files in the data directory and rotate them periodically to prevent uncontrolled growth.
Bitcoin Core Configuration: Pruning vs Archival Node
The most important storage decision is whether to run an archival node or a pruned node. Both fully validate the blockchain. The difference is how much history they store and what they can serve to peers or other tools.
Archival Node: Maximum History and Network Utility
- What it is: Stores the full blockchain history and indexes, enabling the node to provide older blocks to other peers and to certain applications that query historical data.
- Pros: Contributes more to network data availability, supports deep rescans and advanced indexing, and simplifies interaction with tools that require historical blocks.
- Cons: Requires substantial disk space that grows over time, plus more time for initial synchronization and potential performance tuning.
- When to choose: If you have ample SSD capacity and want to maximize your contribution to the network and future‑proof your setup.
Pruned Node: Full Validation with Small Storage
- What it is: Validates every block and transaction but discards older blocks, keeping only a small moving window of recent data.
- Pros: Dramatically lower disk requirements while preserving self‑sovereign verification and mempool participation.
- Cons: Cannot serve old blocks to peers, and some operations that need historical data may be limited or require re‑downloading.
- When to choose: If you have limited SSD capacity or are starting with a minimal footprint. You can always migrate to archival later by disabling pruning and re‑syncing blocks.
Key Configuration Options to Know
- Data Directory: Set a dedicated path on your SSD for chainstate and blocks.
- Prune: Enable pruning by specifying a target size in megabytes. Provide extra headroom beyond the minimum to reduce churn.
- dbcache: Increase moderately to speed validation on the Pi 4 during initial sync, while ensuring the system does not exhaust memory.
- maxconnections: Limit peers if bandwidth is constrained. Keep enough connections for healthy propagation.
- listen and port: Enable inbound connectivity to strengthen the network, typically on port 8333.
- Onlynet and Tor: Optionally route traffic over Tor for privacy. You can run clearnet, Tor, or both.
Network, Privacy, and Security Considerations
Sound networking protects your node, improves its utility, and preserves privacy. The Raspberry Pi 4 can reliably handle multiple inbound peers over Ethernet when tuned thoughtfully.
Port Forwarding and NAT
- Forward TCP port 8333 on your router to allow inbound peers if running on clearnet.
- Use a DHCP reservation or static local IP for the Pi to keep forwarding intact after reboots.
- If port forwarding is not possible, running exclusively over Tor still enables inbound onion peers without exposing your public IP.
Tor Integration for Bitcoin Core
- Install and enable the Tor service and configure Bitcoin Core to use it for outbound and optional inbound onion services.
- Running dual‑stack (clearnet plus Tor) maximizes connectivity diversity and resilience.
- Regularly review Tor service logs if you rely on onion routing for reachability.
Firewall, Rate Limits, and Service Accounts
- Allow only required inbound ports and restrict everything else by default.
- Run Bitcoin Core as a dedicated unprivileged user and keep file permissions tight on the data directory and wallet files.
- Consider simple rate limits or connection caps if your uplink is modest.
Initial Block Download on Raspberry Pi 4
The initial block download is the heaviest workload. Expect it to take multiple days on a Pi 4, depending on SSD speed, network quality, database cache, and whether you use Tor only.
Tuning for Faster and Safer Sync
- Provide active cooling and avoid thermal throttling throughout synchronization.
- Use a quality SSD on a USB 3.0 port, not USB 2.0, to sustain higher throughput.
- Allocate a reasonable dbcache within available RAM and keep other processes minimal during sync.
- Keep the device on reliable power to avoid unclean shutdowns that prolong reindexing.
Ongoing Maintenance and Monitoring
Once synchronized, a Raspberry Pi 4 Bitcoin full node is low maintenance if you adopt simple routines for updates, observability, and safe shutdown.
Safe Updates and Version Hygiene
- Periodically check for the latest stable Bitcoin Core release and review the release notes to understand changes and any configuration impacts.
- Verify signatures again before each upgrade and test a clean restart after updating.
- Avoid skipping many major versions without reading their notes, as default behaviors and indexes can evolve.
Backups, Logging, and Disk Health
- Back up wallet files or descriptors before every major upgrade and after creating new addresses.
- Rotate debug logs periodically and keep an eye on free space to prevent database corruption from a full disk.
- Monitor SSD health indicators exposed by your enclosure or OS tools and replace media proactively if errors accumulate.
Service Reliability and Alerts
- Use a system service with automatic restart on failure to minimize downtime.
- Configure lightweight alerts for high disk usage, abnormal memory growth, or repeated restarts.
- Document your configuration and keep a copy of critical files offline, such as your configuration file and any service unit definitions.
Troubleshooting Common Issues on a Raspberry Pi Bitcoin Node
Most problems trace to storage, power, or network configuration.